Monday, December 31, 2012

On The Other Hand...

My apologies for the lack of posts lately. Report cards plus preparing for two Christmas concerts will do that to a soul. The hope was to get this out before Christmas, but...well, I don't want to save it for next year, so here it is!

* * *
On the one hand...
My plan to make a stack of table mats as Christmas gifts died. I was having trouble adjusting the tension on the sewing machine so that the bottom thread (red) doesn't show through to the top. And all the while, time is running out!
On the other hand...
I came across this post by Tea at Weasel's on Pinterest. If you click the first link and scroll down, you'll come across a picture of these star ornaments:


Scroll just a bit further, and you'll find this link to the pattern on Ravelry. It's a freebie!

They whip up in no time at all (my definition of no time = 10 minutes). They're sweet, and rustic, and beautiful. And they'll make great Christmas gifts. The idea is to do sets of six.

My colour sense is not what I wish it were, so the ladies at Wolsely Wool helped me out, pointing out the area of the store I'd most likely find the right weight of yarn in, and supporting me in my tentative colour choices. (It turns out there's a whole semi-secret annex at the back, roasty-toasty warm because of the old-school radiator heat, where even more yarn is stashed.) I settled on Rowan wool in a navy, an off-white, and a heathered version. As soon as I got home, I had to try it out. (Well, after gloating over my new yogurt maker, but that's another story for another time.)

Confession time: my centres aren't as cutely puffy as those of the original, pictured above. But I'm still pleased. They're Christmassy, and cute, and rustic (but not rusty) and handmade...check, check, check!


I even treated myself to a new hook. Never used one with a thicker handle before, but after an hour or two of use, I'm ready to declare that this. is. it. Soooo much easier to handle! (Get it? handle?)


Ended up packaging sets of 6 (2 of each colour) in a glassine baggie. Popped in 6 dollar-store ornament hooks, et voila! Merry Christmas, one and all!

Otava Sprite Hat Pattern


Can you believe it? My first go at creating a pattern. I've been seeing toques in this style both online and in The Real World and thought I'd try to create my own version.

I used my all-time favourite yarn (Rowan Pure Wook DK) in Kiss and Enamel (commonly known as red and cream). I used my all-time favourite hook (Knitter's Pride soft grip). And I started stitching, typing, frogging, repeating.

Eventually, the result was this:


(By the way, if you would like to avoid a gently sprialing join snaking its way around your Sprite Hat, make sure you do not place the first stitch of each round in the same stitch that the Ch 2 rises from. Start with the next stitch instead. That way, you'll get a seam that runs in a straight line down the back of your hat and is much harder to detect.)


And here's the super cool thing: you can easily modify this pattern to fit any size head. The pattern is written for an adult (i.e. my) head. All you have to do is stop the increasing stripes (anywhere up to row 33) once the hat is large enough around to fit the intended recipient. Then skip down to the non-increasing rows and continue from there. Obviously the stitch counts will be out then, but if you copy this pattern into a word processing program, you can easily change or delete them.  You might need to change the colours to keep your stripes alternating. (Watch for an upcoming post with a modified pattern for a baby's Sprite. I'm doing this one in purples and it's darling!)

To finish if off, a wee pompom would be cute. For younger ones (who might pull out the strings and munch on them), I prefer to crochet a tiny ball or two, stuff them, and attach them instead. The best tutorial I've found for these is at Attic 24's blog. Her tutorial is so straightforward and easy to follow that there's no sense in reinventing the wheel (or the tutorial, for that matter).

So here it is! If you try this pattern out, please let me know how it works for you. I'd love to hear any comments or criticisms...it is my first, and I'm learning and willing to learn!

Otava Sprite Hat Pattern

This pattern was developed using a 4mm (G/6) hook and 2 colours of Rowan pure wool dk 50g/125m for an adult. I used less than 1 ball of each colour for this hat.

Special stitch instructions:
A long sc happens when you insert your hook into the space below the one you would normally use when beginning a stitch. Here's a good YouTube tutorial.

With colour 1:

Rnd 1: Chain 2. 6 sc in second loop from hook. Join to first sc with a slip stitch.
Rnd 2: Ch 2. (This does not count as an hdc.) 1 hdc in each sc around. Join to first hdc. Always join at the end of each round. (6 hdc)
Rnd 3: Ch 2. 1 hdc, 2 hdc in each hdc around. (9 hdc)

At this point, you can either continue with colour 1 (for a solid hat) or switch to colour 2 (for a striped hat). Because my stripes are narrow, I’m not cutting my yarn. I’m just pulling in a loop of colour 2. Later I’ll drop that yarn and pick up the hanging colour 1 yarn. Make sure that as you continue to crochet with your new colour, you leave the old colour hanging to the back (or inside) of your work. If you prefer another method of switching colours, that should work fine too.

Rnd 4: (with colour 2) Ch 2. 1 hdc in each hdc around. (9hdc)
Rnd 5: Ch 2. I hdc in each hdc around. (9 hdc)
Rnd 6: Ch 2. 1 hdc, 2 hdc in each hdc around. (You will end with 1 hdc.) (13 hdc)

Rnd 7: (pick up colour 1) Ch 2. 1 hdc in each hdc around. (13 hdc)
Rnd 8: repeat rnd 7.
Rnd 9: Ch 2. 1 hdc, 2 hdc in each hdc around. (You will end with 1 hdc.) (19 hdc)

Rnd 10: (pick up colour 2) Ch 2. 1 hdc in each hdc around. (19 hdc)
Rnd 11: repeat rnd 10.
Rnd 12: Ch 2. 1 hdc, 2 hdc in each hdc around. (You will end with 1 hdc.) (28 hdc)

Rnd 13: (pick up colour 1) Ch 2. 1 hdc in each hdc around. (28 hdc)
Rnd 14: repeat rnd 13.
Rnd 15: Ch 2. 1 hdc, 2 hdc in each hdc around. (You will end with 2 hdc.) (42 hdc)

Rnd 16: (pick up colour 2) Ch 2. 1 hdc in each hdc around. (42 hdc)
Rnd 17: Ch 2. 1 hdc in each hdc around. (42 hdc)
Rnd 18: repeat rnd 17.

Rnd 19: (pick up colour 1) Ch 2. 1 hdc in each hdc around. (42 hdc)
Rnd 20: repeat rnd 19.
Rnd 21: Ch 2. 1 hdc, 1 hdc, 2 hdc in each hdc around. (56 hdc)
 
Rnd 22: (pick up colour 2) Ch 2. 1 hdc in each hdc around. (56 hdc)
Rnd 23: repeat rnd 22.
Rnd 24: Ch 2. 1 hdc, 1 hdc, 1 hdc, 2 hdc in each hdc around. (70 hdc)

Rnd 25: (pick up colour 1) Ch 2. 1 hdc in each hdc around. (70 hdc)
Rnd 26: repeat rnd 25.
Rnd 27: Ch 2. 1 hdc, 1 hdc, 1 hdc, 1 hdc, 2 hdc in each hdc around. (84 hdc)

Rnd 28: (pick up colour 2) Ch 2. 1 hdc in each hdc around. (84 hdc)
Rnd 29: repeat rnd 28.
Rnd 30: Ch 2. 1 hdc, 1 hdc, 1 hdc, 1 hdc, 1hdc, 2 hdc in each hdc around. (98 hdc)

Rnd 31: (pick up colour 1) Ch 2. 1 hdc in each hdc around. (98 hdc)
Rnd 32: repeat rnd 31.
Rnd 33: Ch 2. 1 hdc, 1 hdc, 1 hdc, 1 hdc, 1 hdc, 1 hdc, 2 hdc in each hdc around. (112 hdc)

Rnd 34: (pick up colour 2) Ch 2. 1 hdc in each hdc around. (112 hdc)
Rnds 35-45: repeat rnd 34. Continue to change colours every 3 rounds.

Rnd 46: (you should be on colour 2) Ch 1. 1 sc in each hdc (112 sc)
Rnd 47: repeat rnd 46.

Rnd 48: (pick up colour 1) Ch 1. 1 sc in each sc. Alternate 1 regular sc and 1 long sc around.
Rnd 49: Ch 1. 1 sc in each sc.

Weave in and trim all loose ends. Ta da!!
 
This pattern is for personal use only. Please do not sell the pattern or anything you make with this pattern. Thank you.

Sunday, November 11, 2012

Robyn's Quilt - Finished!

And wouldn't you know it, I celebrated by going to the store and buying another charm pack! (It's already been sewed into a quilt top much like this one...2 down, 1 to go!)


It's been gray and snowy here, so no beautiful sun-drenched photos. The sun did manage to squeeze through for a few moments at one point though, and this is the result:


Just big enough for a wee girl to cuddle with, and later, to cover her stuffies and put her dollies to sleep. Or her pets. If she's anything like her Mama, she'll be an animal lover!

Just in case you're interested, here's the back. My camera is not a fan of yellow (much like myself), but if you imagine a buttery, blotchy (but in a good way) fabric, this is it.

 
One niece's Christmas present down, many more to go!

Sunday, October 28, 2012

Robyn's Binding

 
I decided to take a chance on my Singer and try a bit of machine quilting. I was worried about the material feeding through, the tension going wonky...but it actually worked! <insert singing angels here>


Some things I learned:
  • There's a reason people buy those bendy safety pins. It prevents hemorrhaging due to multiple poky pins.
  • The machine needs a little help at the beginning. And at the seams.
  • Keep your eye on the prize! That is to say, if I'm too lazy to draw a guideline and decide to wing it, I need to watch where I'm going At All Times.
  • Smoothing the fabric with your fingers as you go can do wonders to prevent puckering.
  • Ironing. Ironing is cool. It's awesome. And it's definitely NOT a waste of time. (see illustration below)

This quilting thing is bringing me up against a whole new set of skills. That's where YouTube and friendly bloggers come in. People who freely share their knowledge so that people like me, who don't know where to start, can actually start.


 This time, it's thanks to Crazy Mom Quilts that I learned how to bind a quilt. Her tutorial is clear and concise...and it works!


Once the binding is complete and I've washed the quilt (now there's a nerve-wracker!), I'll wait for a sunny day to take some pictures of the whole thing. The colours are so vivid and the camera's just not picking up on that in my wee apartment.

Sunday, October 21, 2012

Christmas Hexies cont'd

I have to admit, I was nervous about this step. Piecing the hexies was no problem. But I've never actually quilted anything before, and I wasn't sure I'd do it right, or that my machine would cooperate.

 
(If you're wondering why the edges look wonky, I had to open up the seams of the individual hexies to sew the sandwich together.)

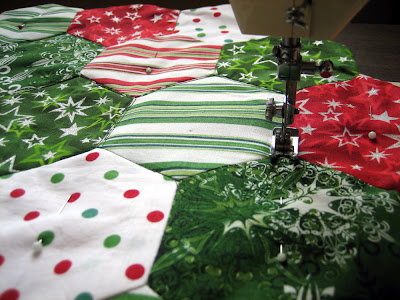
 According to the instructions, I sewed a sandwich comprised of the hexie fabric face down on the red backing fabric (face-up), and the batting on the very bottom. It took a lot of stopping, turning, and re-starting, but I sewed around the edge of the entire thing, leaving one section open.

Turning the whole thing right-side-out was a bit of an adventure, but some gentle tugging and persuasion did the trick.

After hand-sewing the turning-hole closed, I placed some pins randomly and started stitching. (Note to self: slow and steady wins the race.)


These table mats are supposed to be Christmas gifts, so this was my test run. Some things to remember:
  • using red thread on the back looks sharp
  • go slooooooooooow
  • fix the tension before using the machine again
To be perfectly honest, I have to say: I am rather chuffed. Perfect it is not, but I actually finished something! (I'll take more pics of the end result once I've figured out the 3 'things to remember'.)

On a Roll

It took no time at all! The Jelly Roll Quilt (also called the 1600" Quilt) was a snap to piece up. In fact, it was so easy that I had to keep reminding myself to slow down!

 
Check the previous post for a link to a great video tutorial. If you can use a sewing machine at all, the basic steps are most simple.


Piece each strip into one long strip. Order is not hugely important. I just grabbed them as they came out of the package.


Once every single piece is sewn into the strip, cut off about half of the first colour. (This ensures that the seams in your long strip don't end up lining up in an annoyingly regular way.) Carefully match the ends and sew a seam. When you get to the end of your seam, cut the fabric strip in half.

Continue lining up the ends and sewing a seam. You'll double the width of your fabric every time. End result: see top of post. A glorious, anabashed riot of colour!

Added bonus: because it's so simple, it's a good opportunity to practice sewing straight seams. Very very straight seams.

Now I need yet more fabric...binding, backing, and batting, once again. Better go tweak the budget to include more money for hobbies!

This Is What Happens...

when I decide that October will be 'don't spend anything' month. Ha!


Batting for 2 or 3 projects. Fabric to back mats, a mini quilt, and the Princess. And fabric for some new projects.


I haven't worked with batiks before, and when it comes to my clothing and decor, I like neutrals, neutrals, and more neutrals. If I'm feeling really daring, I'll go with slightly stronger neutrals. But this package looks like a ton of fun. Time for a Jelly Roll 1600' quilt! I've watched this YouTube clip over and over again...here's hoping some of it's sunk in!


Oh, and I ogled a few sewing machines. Each one of which is several times the value of my car. <sigh> But how can I save for a sewing machine when I have 'no spending' months like this?

Monday, October 15, 2012

The Princess - Pieced!

Backing, batting, and quilting is *all* this lady needs! I finished her more than a week ago, but had no where to photograph her, so I waited till I was at my parents'. (Don't they have a lovely yard? You can see the neighbour's shed in the background.)


I was extra careful to sew a consistent seam and line up the seams carefully. I think it paid off. It's not perfect, but I'm satisfied.

I love how the reds pop and the blues and greens calm and the pinks, well, they're the girly princessy part! The sunlight threw a dappled shadow through the trees, making it a wee bit enchanted-looking, in my humble opinion.

Ok, not so humble. I'm just tickled to have finished something!

Monday, October 8, 2012

The Little Old Singer That Could

My sewing maching cost me $50 (plus a hefty cleaning and oiling). It has precisely 2 stitches (regular and zigzag), although...wait for it...it can do 3 widths of zigzag.

And guess what? It's the perfect machine for learning to sew. My options are limited, so I don't have to worry about making a 'wrong' choice. While I ogle the new, electronic, computerized models, this one serves my needs perfectly for the time being.


We've been busy, my Singer and I. (It's a wee bit older than I am, but neither of us is too old to work hard!) And who needs a working task light when you've got a large window?

(By the way, the poor fellow came without a bobbin holder. Guess what? A crochet hook jammed into the hole works just fine. We both have our quirks.)

Sunday, October 7, 2012

A Charm Pack + An Afternoon


It's the Thanksgiving long weekend, and I've got time to sew! Our family will be thankful two weeks later than usual. In the meantime, I couldn't wait to put this charm pack together. Since the squares are so small, I just arranged the squares in a 6x6 square, using good ol' ROY G BIV to help me decide which colour to use next. (If you look carefully and squint just right, there's an approximate colour progression going on here.)


I've got 5 nieces and 1 nephew, so I used the overwhelming preponderance of females to guide this fabric choice.

 
See? Girly girly girly. And fun fun fun!


I'd like to finish it off with a coloured border and backing, but am not sure which direction to go in. Solid? Striped? Batik? Neutral? Help? What do you think?

Christmas Hexies


Of course, I couldn't possibly finish one project before diving into another, so I went ahead and purchased meters of Christmas fabric. This project was inspired by one in a fall quilting magazine. The original has embroidered sections, but I decided to go easy on myself since I'm planning on making at least 6 of these...they will hopefully make their way to the Christmas gift pile soon! I've already got 3 pieced together, just waiting for batting and backing, and a wee bit of machine quilting. Here's hoping my 1970s Singer can handle the thickness!

Piecing the Perfect Princess Quilt


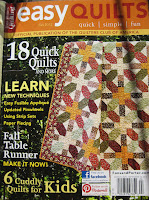
Absolutely non-princess me fell in love with this quilt, featured in EasyQuilt's Fall 2012 issue. Could I make do with a similar fabric? Oooooh no, I had to order the 'Hello Luscious' Moda fabric online. And could I assemble the squares randomly? Oooooooooooh no, I had to follow the magazine's full-page picture precisely.


And I'm so glad I did! Matching and creatively mis-matching fabrics is not my forte, so I'm perfectly content to emulate someone else's genius.


This fabric in this configuration...it's sweet, but not precious. Spunky but not spoiled. I love it! Just a couple of rows to piece and attach and the front will be done!


Saturday, October 6, 2012

A Little Hex-Crazy

My grandmother, Mrs. P., was a woman much endowed with the creative genius. And she knew it! She painted murals for her church. She wrote and illustrated original stories for her children. She painted and sculpted. She baked. And she sewed. She sewed us marvelous English-paper-pieced quilts with scraps of fabric that were not only warm, but endlessly entertaining too. I still have mine, tucked away somewhere. The thread has started to eat through some of the fabric, so it needs some TLC.

I wanted to try it out for myself, and a couple of YouTube videos later, I was hooked. It's easy, it's fun, and it doesn't take a lot of work before you start to see the whole thing coming together! This video taught me how to cut hexagons quickly and efficiently.

This is my first project, my learn-as-you-go project,  and I started with this quintessentially English robin fabric. I chose the other 2 fabrics to complement it. Whaddaya think?


The plan is to make 5 rows in total: 3 bird and 2 orange. It'll be a cozy lap-quilt size once it's all done. 

 
And pardon a crafter's pride, but I kinda like the back too. It's a warm, fuzzy feeling to know that I hand-stitched this! (Don't worry, I'm not crazy. I'll use the machine for the backing.)


Friday, October 5, 2012

Sewing Up A Storm


So, instead of working on the 50 other current projects I have going, or cleaning, or prepping for tomorrow's classes, or cleaning, or exercising (or cleaning), I sewed. A lot. 7 pillowcases, ready for crocheting. It'll likely take a trip into Winnipeg to find the right colour and weight of cotton yarn (I use cotton or a cotton/bamboo blend), and then I'll have a few more Christmas presents for the to-wrap pile!

Red Buds Pillowcase

I don't consider myself a flowery, rose-buddy kinda gal, but the gentle vintage-y vibe of this fabric just called out for a crocheted edging, and that won me over.


My first try: a 100% pillowcase with a soft, crocheted edging.

 
A flap inside the case protects and hides your pillow.
 

A beautiful addition to my linen collection! (Do I have a linen collection??)

The tutorial I used to create this pillowcase is easy to follow and illustrated with helpful photographs. In fact, You Go Girl! has a whole collection of great sewing tutorials; try one out for yourself and see!